Note: If you’re using Google Apps for SSO, no action is required.
We are soon changing our name from CV Partner to Flowcase.
To continue with a smooth and secured sign in process, we would like to ask you for cooperation with adding our new domain to your current Single Sign-On (SSO) setup.
If your company handles Single Sign-On (SSO) with Microsoft Entra ID (formerly Azure Active Directory), Active Directory Federation Services (ADFS), or third-party SAML providers like Okta, you’ll need to update your configuration to include our new flowcase.com domain. The old cvpartner.com domain will still work. If you are using Google SSO, no action is required.
What’s needed?
Your Identity Provider (IdP) configuration needs to be updated.
The sign in domain URL https://<domain>.cvpartner.com will be changing over to https://<domain>.flowcase.com. Therefore, you have to add new Flowcase URLs to your SSO configuration as described further in this article, so that both domains will work.
Who can do this?
Someone who takes care of the SSO in your company. Either they are part of your internal IT-department, or you are using an external part to handle this for your company.
What if you don't update your configuration in time?
No worries! Users will still be able to sign in using cvpartner.com, but anyone trying to use the new flowcase.com domain will see an error message and won’t be able to sign in until the configuration is updated. To avoid this, we recommend adding both domains now so that users can sign in from either address.
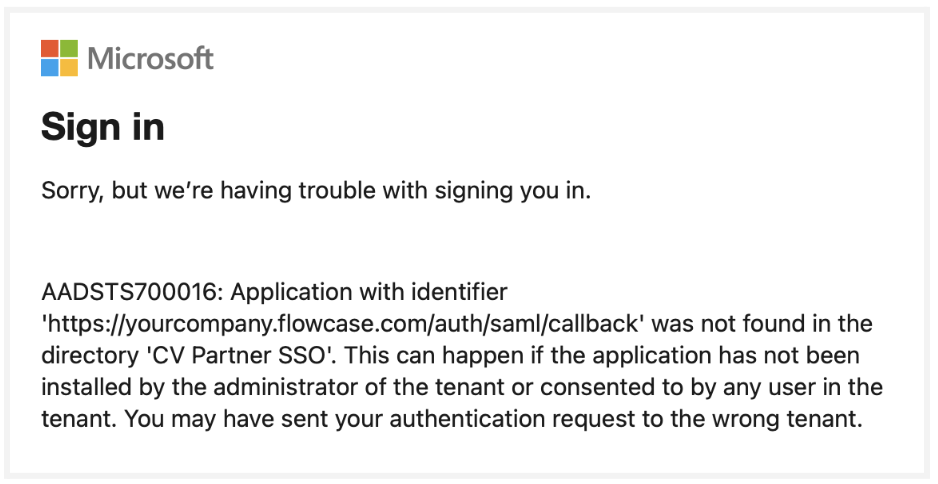
Configuration for Entra ID/ADFS
These steps are specific to Microsoft Entra ID (formerly Azure Active Directory) or Active Directory Federation Services (ADFS), but the callback URLs required for third-party SAML providers, such as Okta, are the same and can be found below.
To allow users to sign in using the new domain, you'll need to add flowcase.com to the list of callback URLs.
Steps to update your configuration:
1. Sign in to Azure or Microsoft Entra ID: https://portal.azure.com or https://entra.microsoft.com
2. Go to Enterprise applications → All applications

3. Find and select the Flowcase SSO application from the list
4. In the sidebar, click Single sign-on
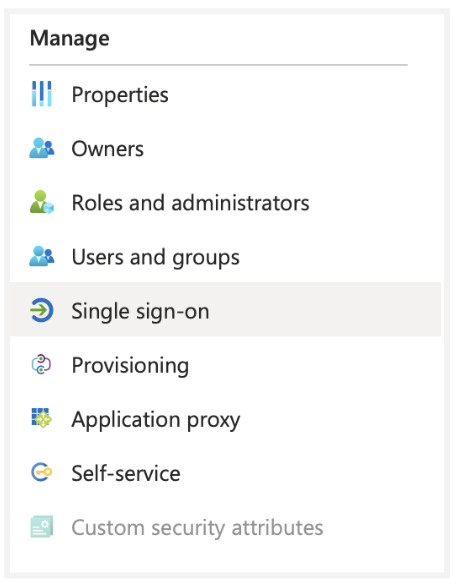
You should now proceed with the instructions for either SAML-based Sign-on or OIDC-based Sign-on, depending on your setup.
The type you are using should be visible at the top of the page, beside the application name.
Configuration for SAML-based Sign-on
1. Next to Basic SAML Configuration click Edit
2. In the Identifier (Entity ID) section, click Add Identifier. Enter the new callback URL, replacing “yourcompany” with your company’s domain name. Make sure to set the new flowcase.com URL as the default by checking the box

3. In the Reply URL (Assertion Consumer Service URL) section, click Add Reply URL and enter the new callback URL again

Note: If your company uses multiple subdomains, repeat steps 2 and 3 for each.
4. Update the Sign-On URL and Logout URL to use flowcase.com instead of cvpartner.com. The Relay State field can be left empty
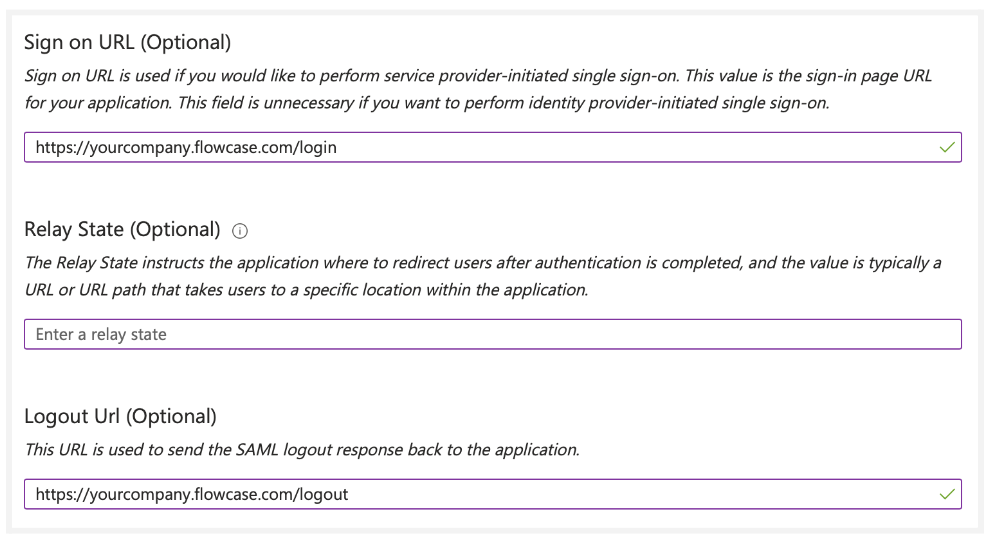
5. Click Save. You are now done with the configuration.
Configuration of OIDC-based Sign-on
1. Next to Configure application properties click Go to application.

2. Under Essentials look for Redirect URIs and click the link beside it.

3. In the Web, Redirect URIs section, click Add URI, then enter the new callback URL, replacing “yourcompany” with your company’s domain name.

4. If your company uses multiple subdomains, repeat step 3 for each.
5. Click Save.
That's it! Now, test your configuration by signing in from both yourdomain.cvpartner.com and yourdomain.flowcase.com
Configuration for Okta SAML
// Callout Note: You will need an Okta administrator account to make this change.
- Login to your Okta tenant, and click the Admin button in the top right.
- In the sidebar, click Applications to expand the menu, and then choose Applications from the list.
- Find the Flowcase application in the list and click on its name to open the settings.
- Click the General tab and scroll down to SAML Settings, you should see the following options. Click Edit.
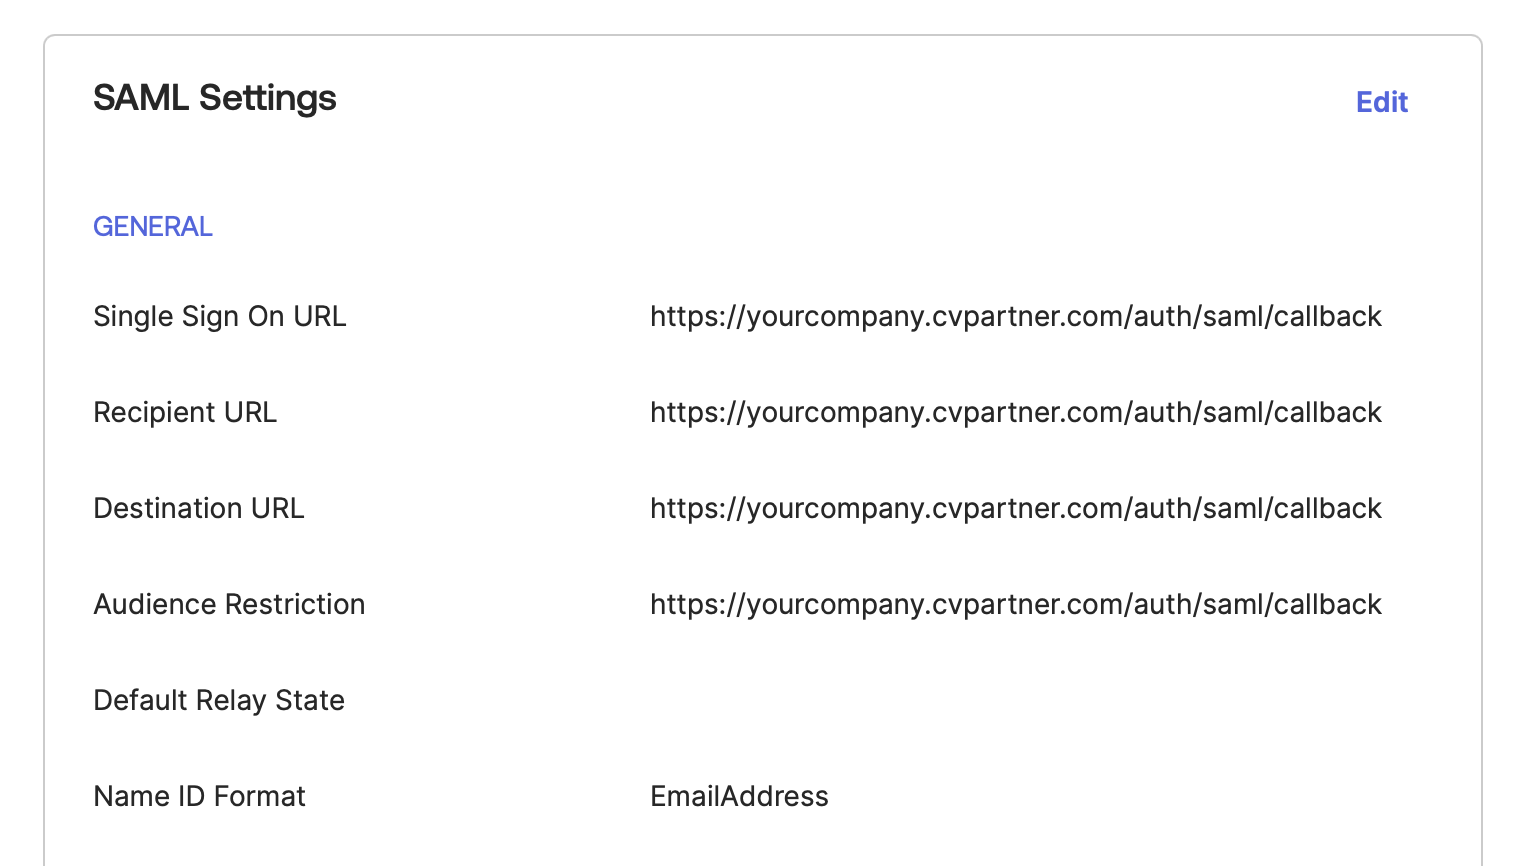
5. In the first step of the edit wizard, you can change the application name, we suggest changing this to Flowcase (formerly CV Partner) to help your users recognise the new name. Click Next.
In step 2, A) SAML Settings, ensure “Use this for Recipient URL and Destination URL” is enabled, and then change the Single sign-on URL and Audience URI (SP Entity ID) to the new domain, taking care to replace “yourcompany” with your own domain name:
https://yourcompany.flowcase.com/auth/saml/callback
6. Click Next.
7. Iinally, in step 3 there are no changes, so click Finish.
8. Click the General tab once again, and scroll down to SAML Settings, and verify the new domain is being used:
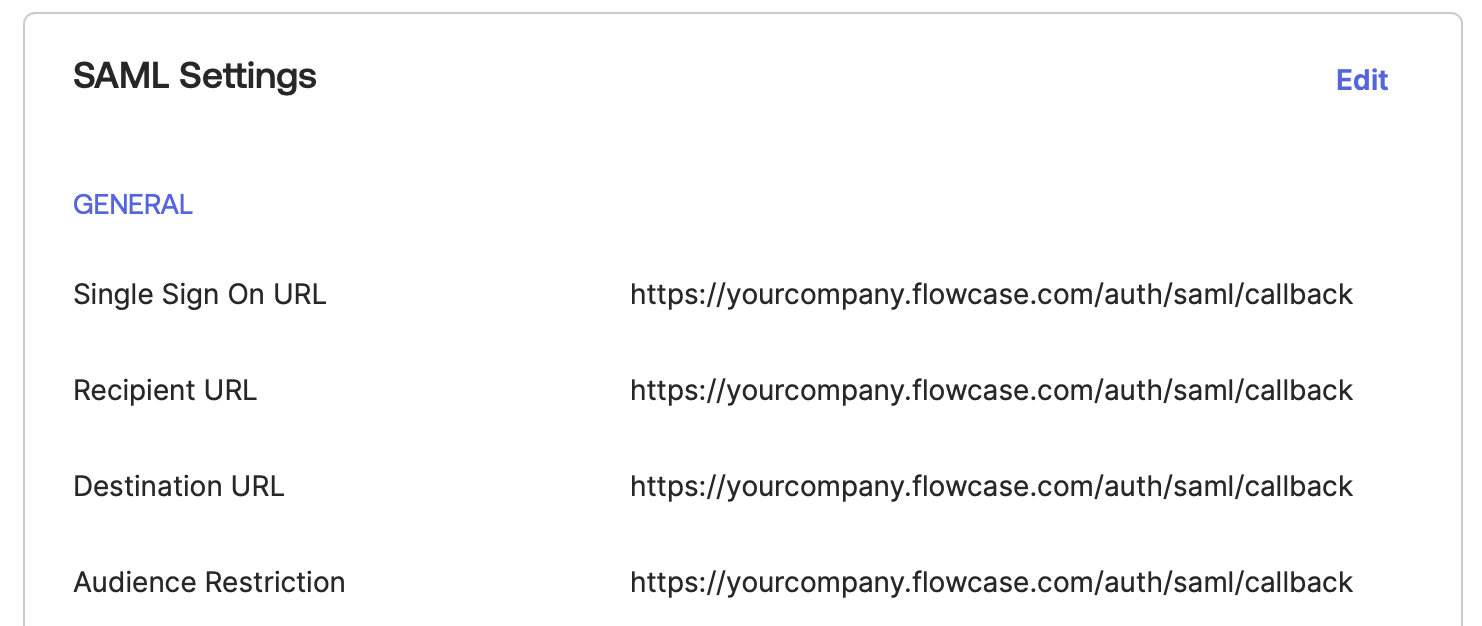
9. That’s it! You're done with the configuration.
Let us know on the chat down on the right corner if you have any questions or issues regarding your SSO migration!


.webp)
